Create image gallery - Wordpress Example
By Admin
Jul 28, 2018
In this example we will learn how to create an image gallery in wordpress. Wordpress makes it very easy to add images to your blog” posts ” and “pages”
In ” Post Editor ” screen you can easily click on ” Add Media” button and upload your images to a ” post ” or ” pages “.
you can add multiple images, all the images will be appear one after another, with ” Create Gallery ” option you can perform many operations to your images.
For example you can perform ” Thumbnails operations ” for your images, Full images .
Merely wordpress comes with a built in gallery feature. but you can also used ” wordpress plugins ” to create image galleries that looks good.
In this article we will show you two different methods to create image gallery to your ” posts ” or ” pages “.
Method 1 – Create an Image gallery without a Plugin
In this method we will create an image gallery without using any plugins.
WordPress comes with a built in features where you can create a gallery. This feature does not have many options.
First thing you need to edit the “post” or “pages” where you want to add image gallery. In post editor screen click on the “Add media” button to upload your images.

You can select images from media library option. After selecting and uploading your images click on the create gallery button from end of left column.

Now you will be able to see selected images with gallery settings.
you can add ” Caption ” settings to each image in your selected gallery.
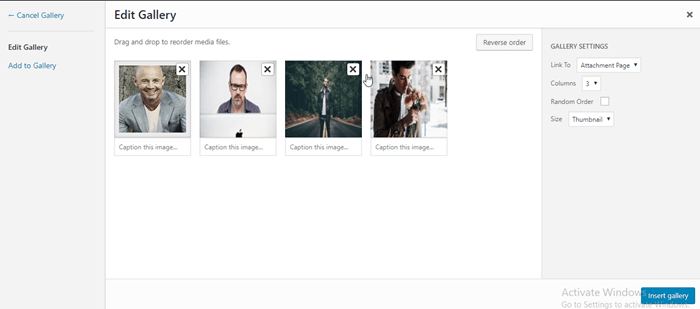
click on the ” Insert Gallery” to apply changes.
Goto ” post editor ” image gallery screen and see photo gallery images in visual mode
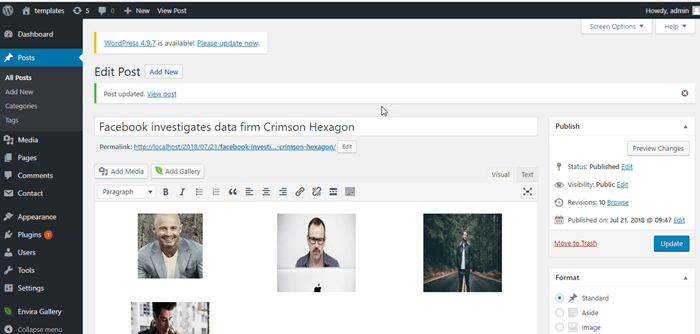
save and publish your post, visit to website to see your image gallery, you will design this block for whatever way you want to show your gallery images.

If you want to be add more attractive image galleries on your website then you
should use next method.
Method 2 – Create Image Gallery by using “Envira Gallery” plugin
We will create image gallery using ” Envira Gallery ” plugin.
This plugins allows you to create beautiful, responsive, modern images galleries in your wordpress site.
You need to follow steps for installation and activation of Envira Gallery.
” Envira gallery ” comes with many advanced feature like ” lightbox popup “, ” easy image navigation “.
Firstly you need to install and activate the “Envira Gallery” plugin.
Dashboard => Plugins => Add New => Envira Gallery
Goto : dashboard to see activated “Envira Gallery“ plugin.

After this step click on the Envira Gallery ==> Add New to create your first gallery.
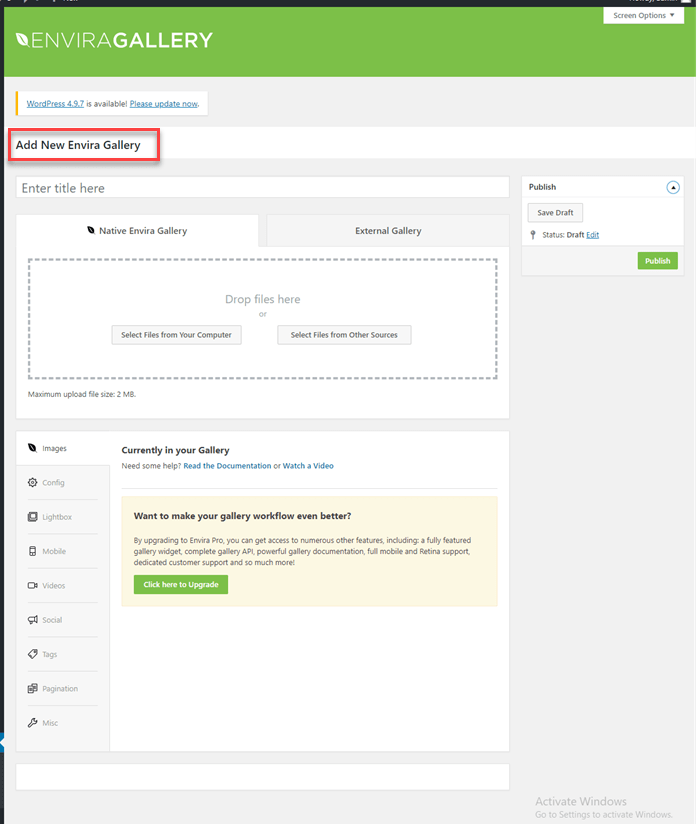
provide a ” title “ to your gallery and click on the ” selected files from computer” to upload your images.
You can select images by clicking on the ” Select files from other sources” button.
once you upload your images it will show in Images section.
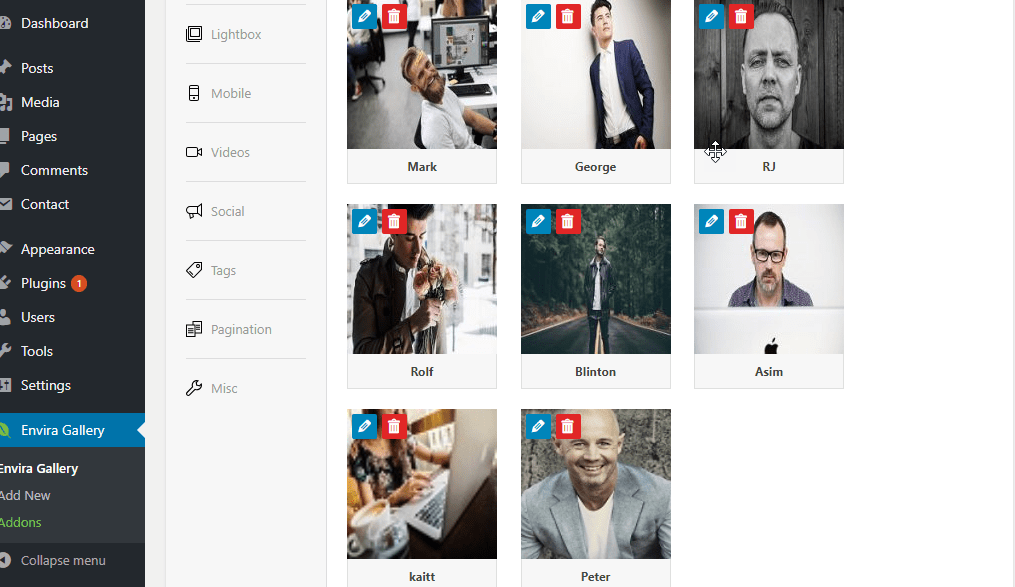
You can perform many operation by clicking on the “ pencil icon“.
For example: caption, title, and alt text.
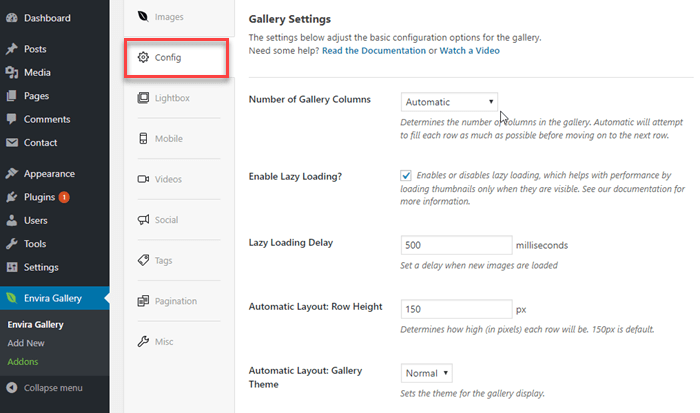
After that click on the ” config tab“.
It comes with many options like ” Number of gallery columns “,” Enable Lazy Loading “,” Lazy loading delay “, “Automatic layout “, ” Automatic layout : Gallery Theme “.
Next menu is ” lightbox ” that allows you to ” enlarge ” your images and browse them without leaving the page.
lightbox comes with many built in options like : ” Enable lightbox “, ” Gallery Lightbox Theme “, ” show title ” or ” caption ” and ” image size “.
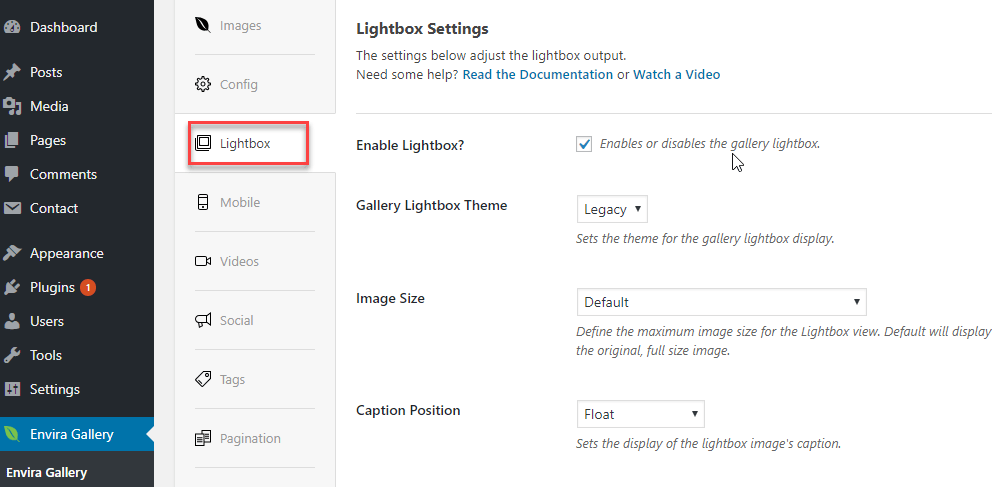
you can review and change your lightbox settings.
Now you can “publish” your gallery and accomplish your changes.
you can perform ” Envira Gallery ” to a post/page . So you need to edit a post/page where you want to display your gallery.
you will see a ” Add Gallery ” button above the post editor.
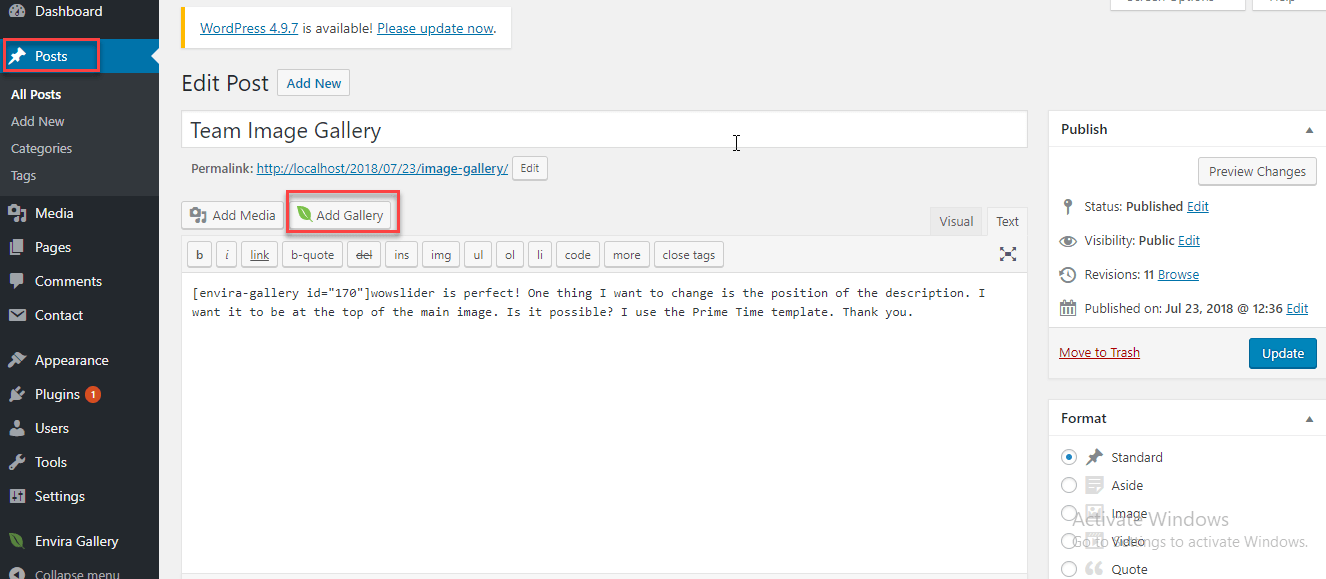
click on it, there will be a new screen like this :
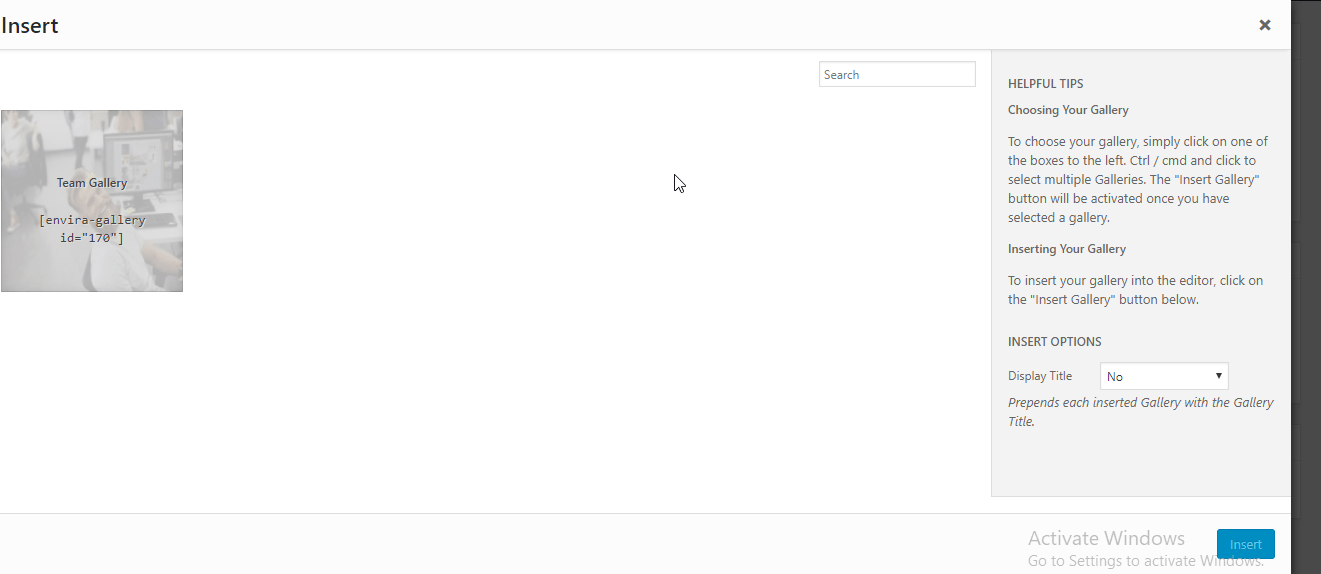
click on gallery that you have just created, click on the “ Insert” button.
you will be see a “shortcode” in your post editor screen like this :

save and publish your post and see website page.
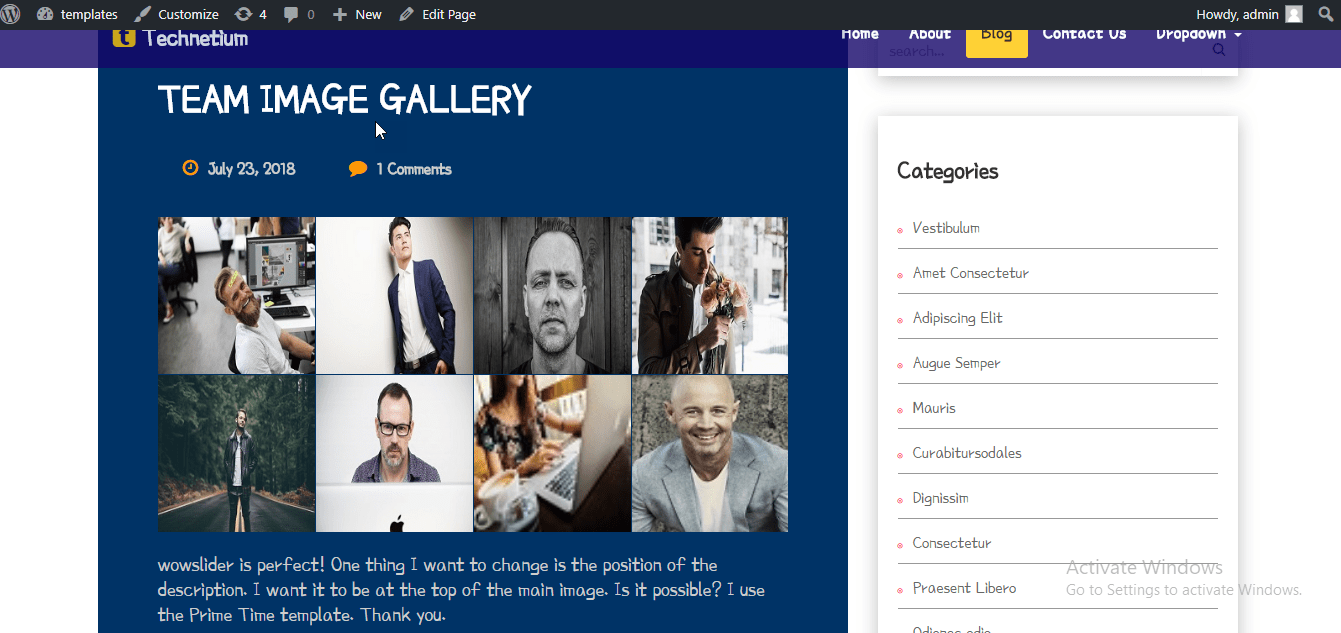
when you click on an image it will open the image in ” lightbox “.

You can also check gallery images by next and previous button click.